There are several virtual machine managers present in the market. However, the main functionality of all VMs are the same. Most people like to get free VM managers, so that they can install as many operating systems as they like over the host operating systems. One of these free VM managers is Oracle's VM VirtualBox, which can be downloaded from Oracle's website for all popular operating systems, such as Linux, Windows and Mac.
Once downloaded, setup a Guest OS (for which you can follow VM VirtualBox's provided instructions - installing Guest OS is not discussed here). VM does not provide usage of host drives/folders on Guest OS until they are explicitly shared. However, sharing host drives\folders might not be as simple as clicking and enabling sharing. It needs some steps before you can use host drives and folders (and surely all the files contained in them).
I followed the steps provided from various help articles, but they were quite tricky and not straightforward and easy to implement. However, with little effort I worked out these issues. Before you implement these steps on your VM, make sure that you have:
- Oracle VM VirtualBox
- Your Host can be any OS
- The Guest can be any version of Microsoft Windows (98, XP, Vista, 7, etc.). I used Windows XP.
Now you can follow these steps:
Run your Host OS and launch VM VirtualBox.
Start your Guest OS in which you want to share drives/folders and files contained in them.
Click on "Devices" tab provided on the VM VirtualBox taskbar and select "Shared Folders" from the drop-down list.
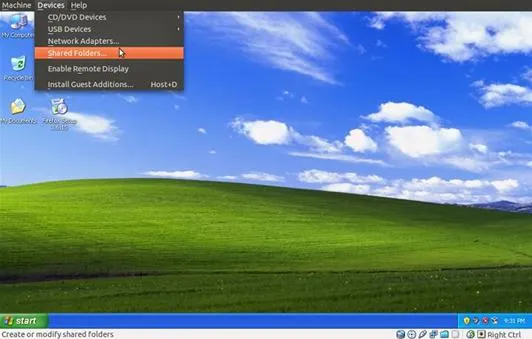
VirtualBox will open a window "Shared Folders". Click on the top icon in the right-hand corner to add the drive/folder. Another window will open—"Add Share".
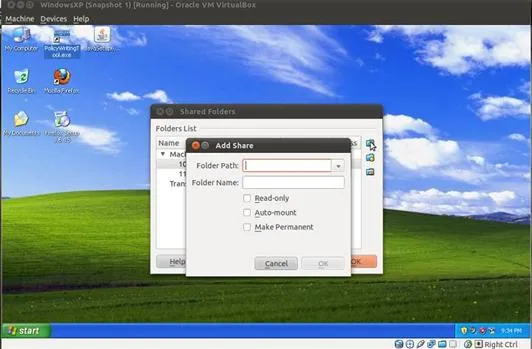
"Add Share" allows you to give the path of the drive/folder you wish to share from the Host OS by giving the path in "Folder Path". You can also browse the drive/folder from your Host OS if you don't remember the exact path of the contents you want to share.
Now type the name of the folder in the "Folder Name" box. It can be any name you wish to have on Guest OS. Also, check the boxes "Auto Mount" and "Make Permanent" and click "OK".
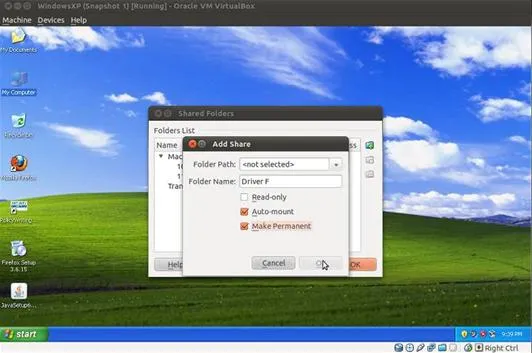
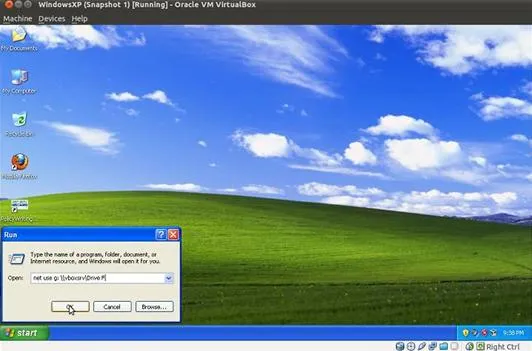
Go to "Start", select and click "Run" on Guest OS. Type "net use x: \\vboxsrv\Drive F" as the run command and click "OK". If you have done everything alright, then no message or notification will appear. Note that the shared drive/folder name should be the same as given in the "Share Folder" window from Step 6. I gave it "Drive F".
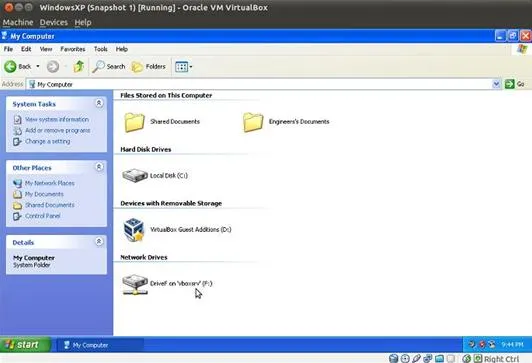
Go to "My Computer" and there you will see your shared drive/folder under "Network Drives". Now you can access all contents contained in the shared drive/folder that you just shared. You can add as many drives and folders as you want following the same steps.




Comments
Be the first, drop a comment!