Just because you update to the Windows 7 operating system doesn't mean you have to lose all of your older programs and applications. Windows 7 has a virtual PC option that you can download, which allows you to use older programs and apps via Windows XP Mode.
Is Windows XP just not customizable enough for you? Well, it was made that way so you don't eff up any of the settings to the point of no return. However, if you are confident in your computer expertise then modifying user accounts may be something of interest to you.
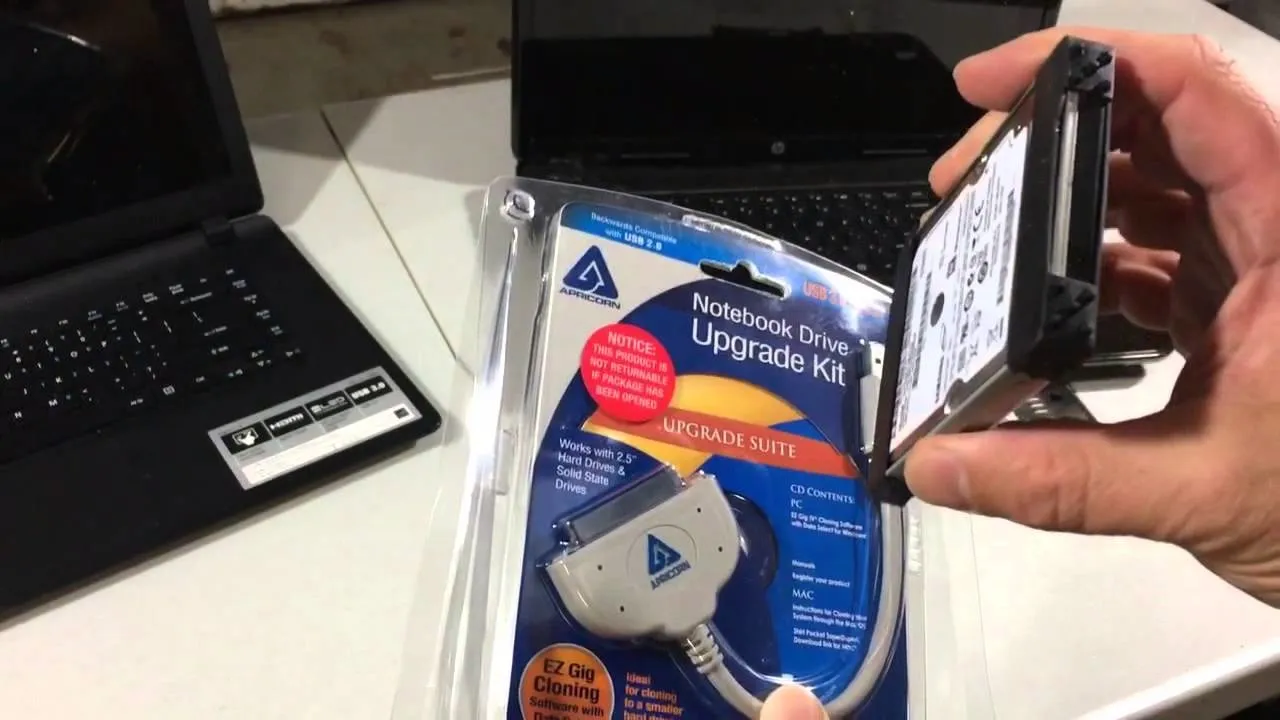
If you have a broken laptop computer, but the hard drive still works, this video will show you how to access and remove your old photos, pictures and files.
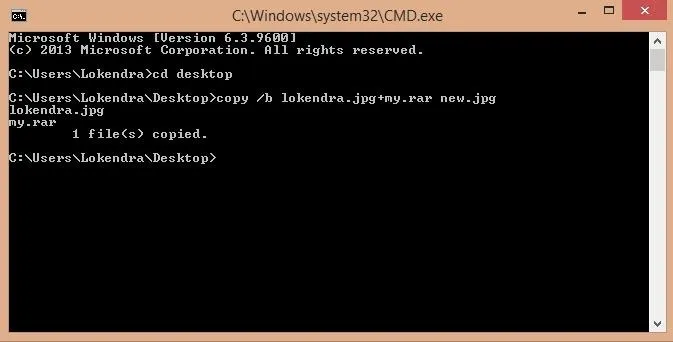
First of all you should make a folder and rename it as 'my'.Move all your files on that folder and place it on desktop.Also Move a jpg file on desktop and rename it as lokendra.Note: You must install winrar software.
If you've got a desktop computer, I can almost guarantee that you've got a widescreen monitor set up in landscape mode. It's how just about everyone uses their monitor these days, including myself. Except that it's not always the best way of working.
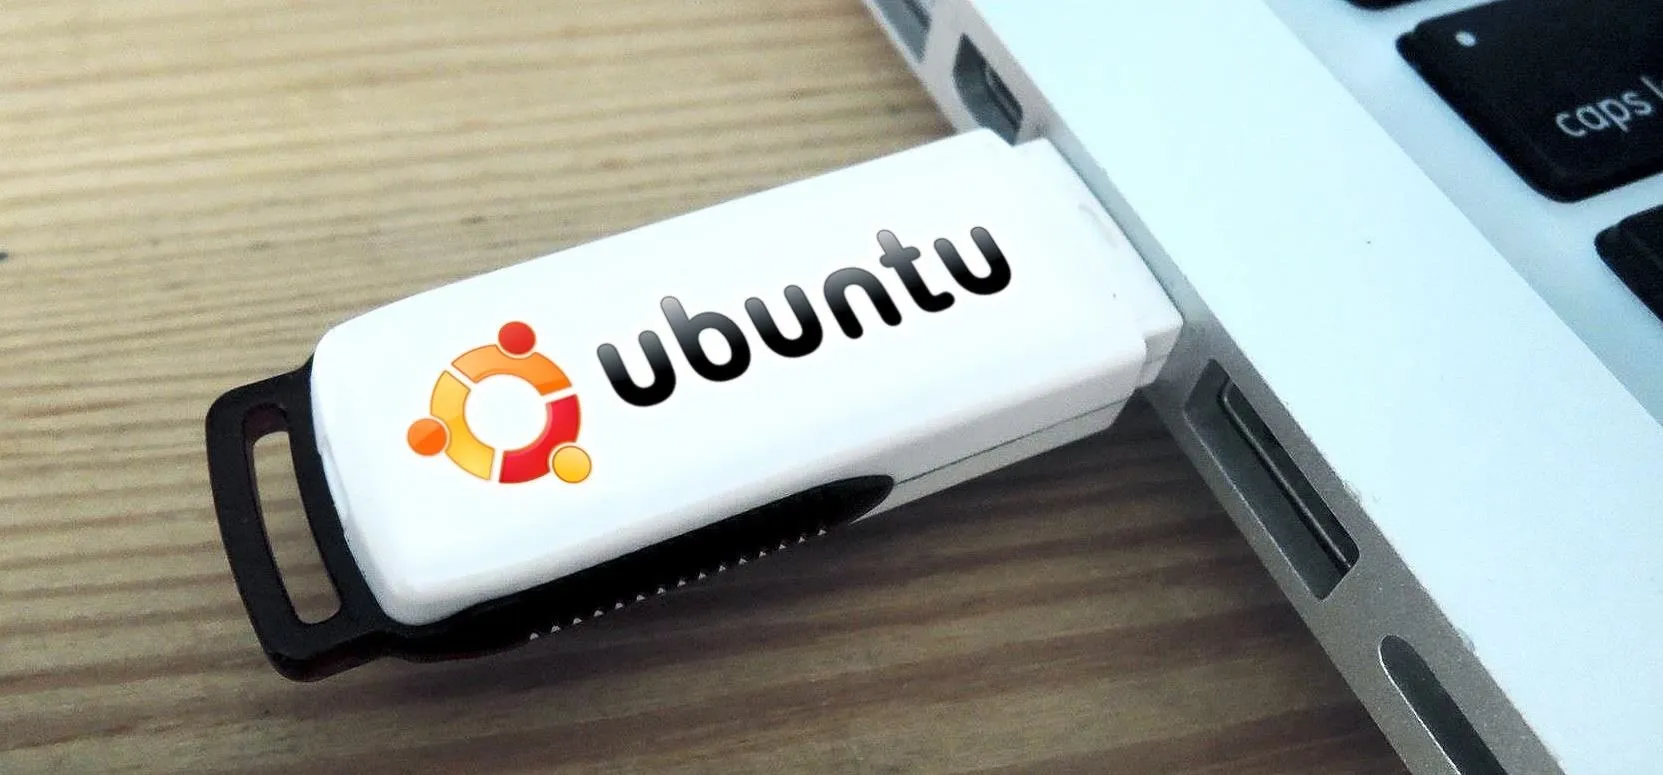
If you've ever wiped your computer without having a proper backup of your operating system, or just wanted to cause some havoc online, chances are you've had to rely on Linux to help you out, specifically the Ubuntu distro.
This video will show you how to change windows update settings in windows 7. All steps are here in this slide presentation. So please watch the video and follow all the steps to change windows update settings in your PC.
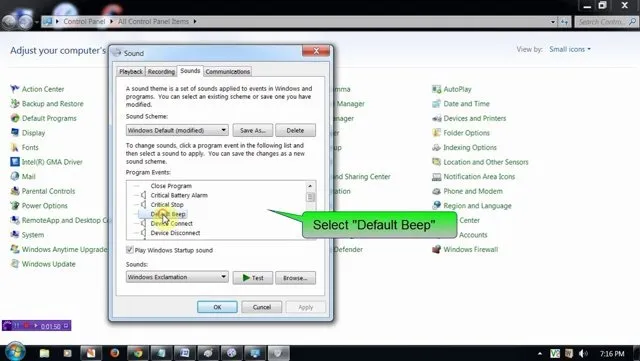
This video will show you how to disable windows beep in your PC. If you are using windows 7 or 8 in your PC and don't want beep sound at the beginning. Watch the video and this video will help you to mute the default beep.
This video will provide an idea how to know top 10 windows 7 shortcuts. This shortcut helps to make your PC experience smoother and faster. Watch the video and follow all the steps to do it yourself.
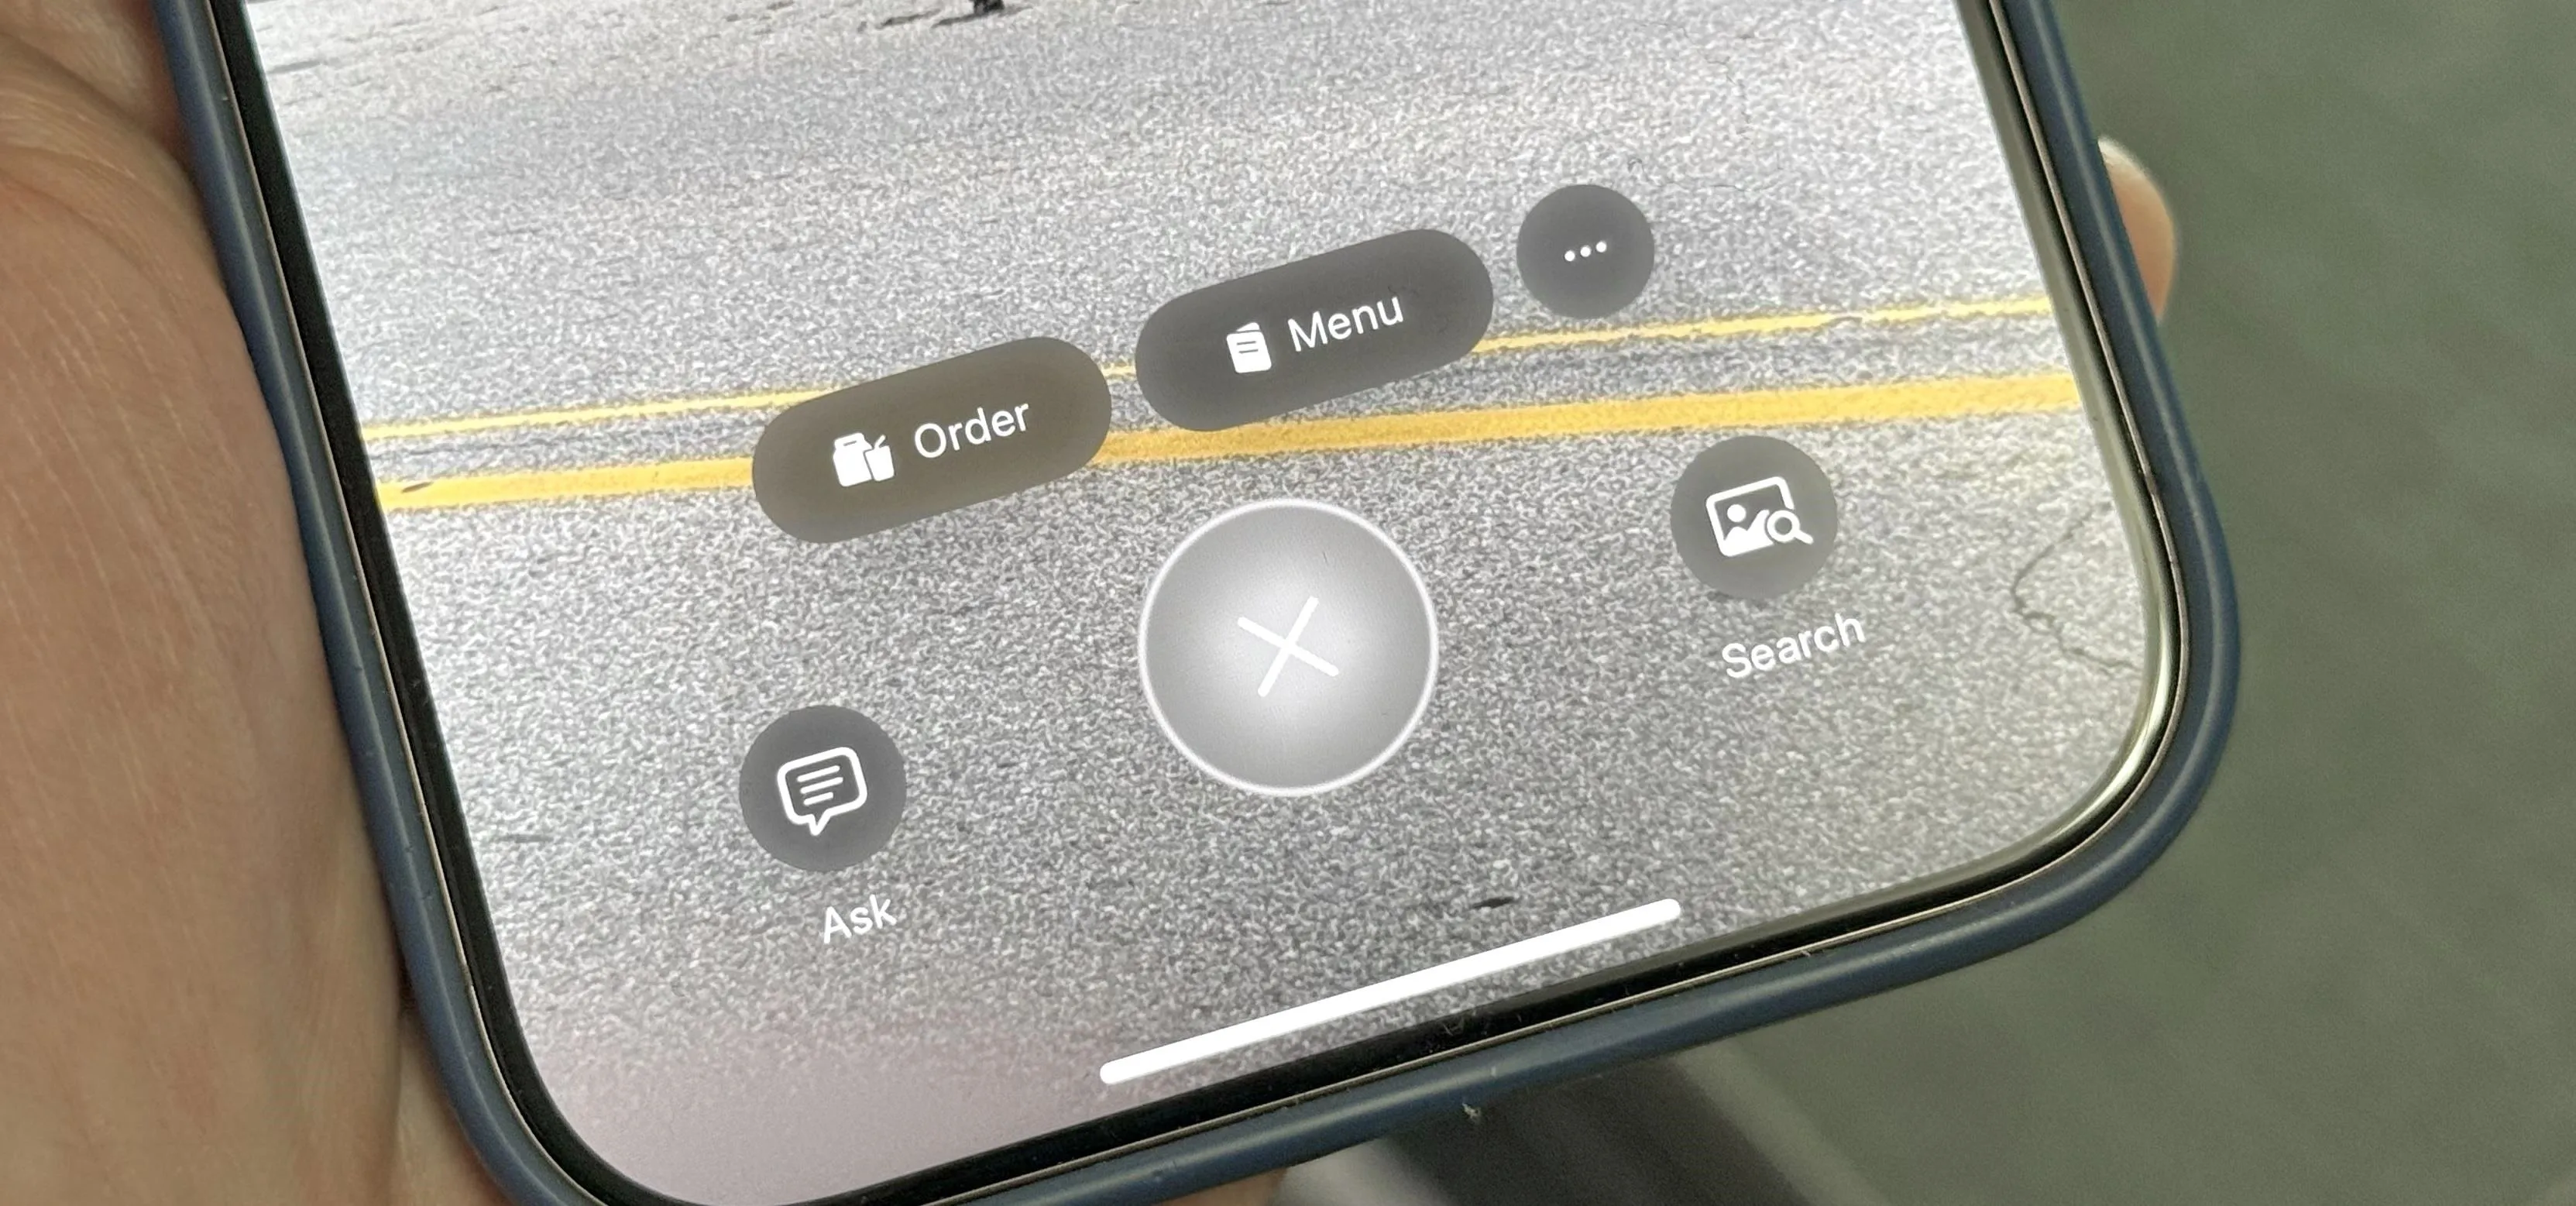
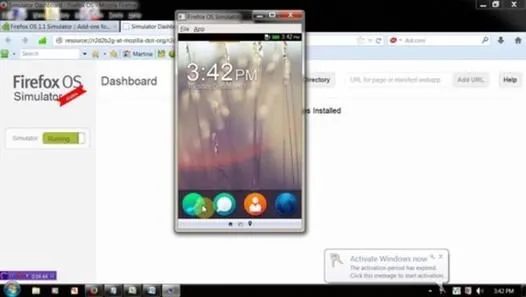
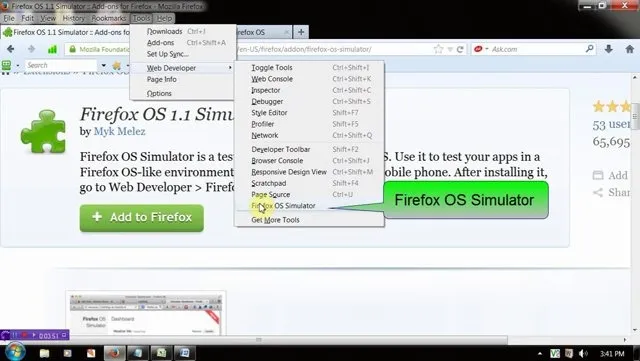
This video will show you how to simulate Firefox OS for Smartphones in your PC. But you could feel the OS in Smartphone by simulating it in your PC. Watch the video and follow the steps carefully. Employ the technique in your PC.
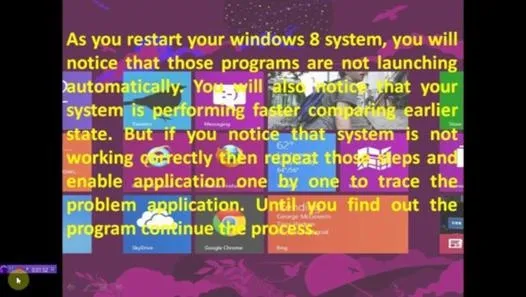
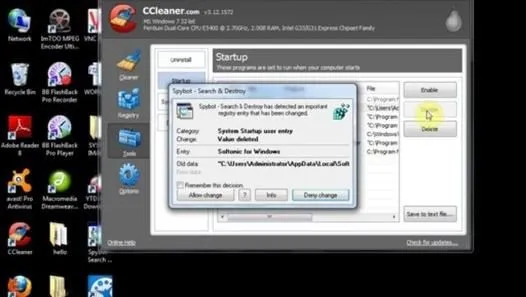
This video will show you how to Speed up Windows 8 System by Disabling Startup Program. This is mostly done by disabling few programs to launch at startup time. Be careful before disabling programs otherwise you may disable few important programs which will affect normal functioning of PC. Watch the video and follow all the steps.
This video shows top 10 useful tricks in windows 7. This video includes window key application, inserting program or folders in start menu or task bar, enabling or disabling windows7 features, notification area customization, reliability history etc. These tips will help you to operate windows 7 more efficiently. So please watch the video.
This video will provide an idea how to disable startup program to speed up PC in windows 7. By disabling few programs will increase the speed of the PC. Watch the video and employ the technique in your PC.
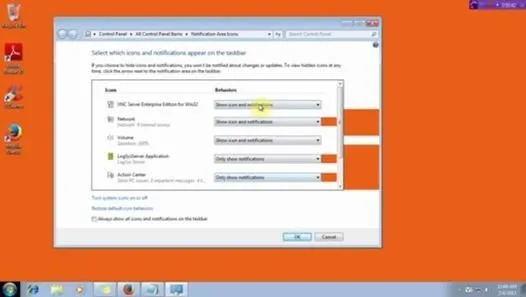
This video will show you how to customize the notification area on windows 7. Notification area is a small portion at bottom right corner of the screen. You could customize the notification area by adding new icons, removing icons and changing their behavior. Watch the video and follow the steps.
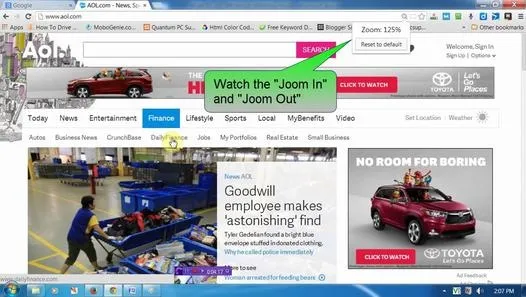
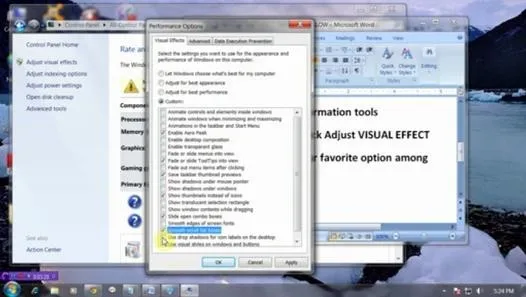
This video will provide an idea how to speed up your windows PC. Here windows 7 are taken for example. You could increase the overall computer speed by manipulation of Graphic Setting from Control panel. Watch the video and follow the steps to do it yourself.
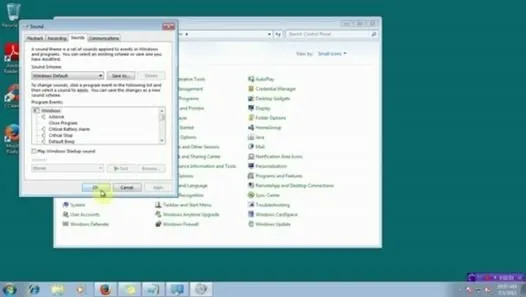
This video will provide an idea how to Disable and Enable Windows Startup Sound. Watch the video and employ the technique to disable and enable windows startup sound on your computer.
This video will help you how to disable user account in windows 7. This is very easy to employ. Watch the video and follow all the steps to disable user account in your PC.
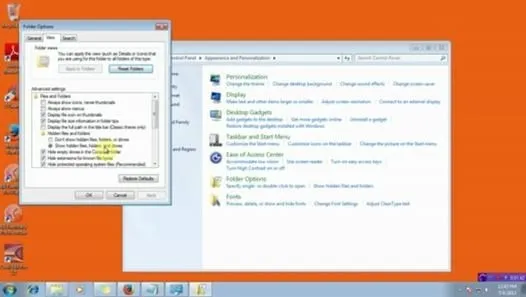
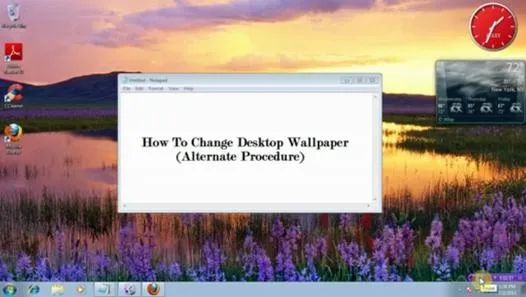
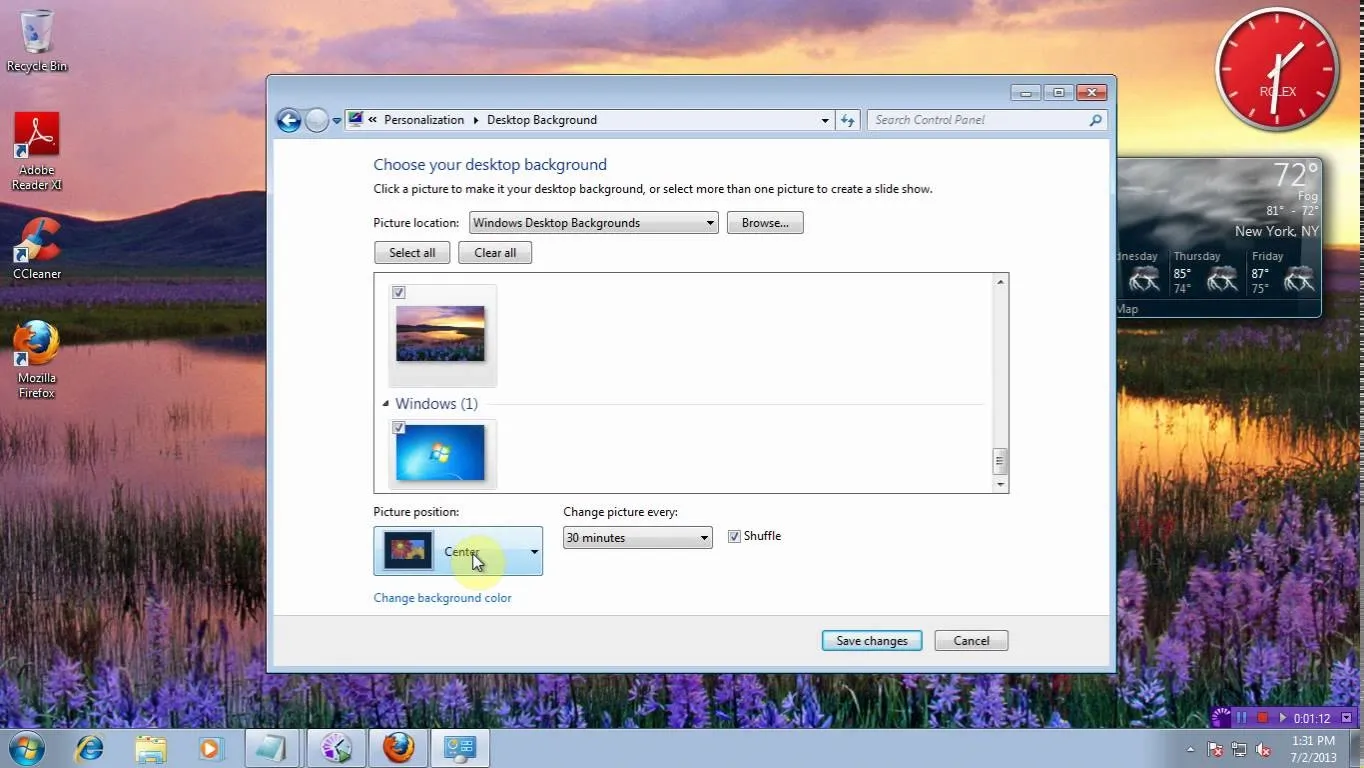
This video will provide an idea how to change and customize your desktop background. Watch the tutorial video and follow the steps to change desktop wallpaper in your PC.
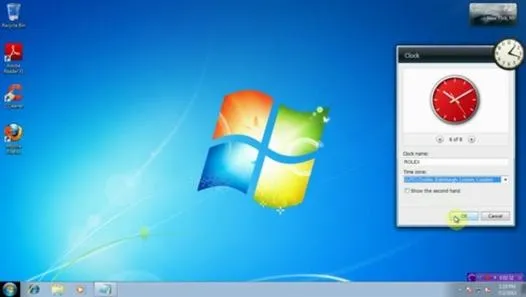
This video will help you how to set and customize desktop gadgets in your PC. Change the feel and look of the gadget according to your choice. Watch the video and follow all the steps to employ it yourself.
This video will help you how to create system image backup in windows 7. If you create an image of your system you could restore after crashes. Watch the video and follow the steps to create system image backup in your PC.
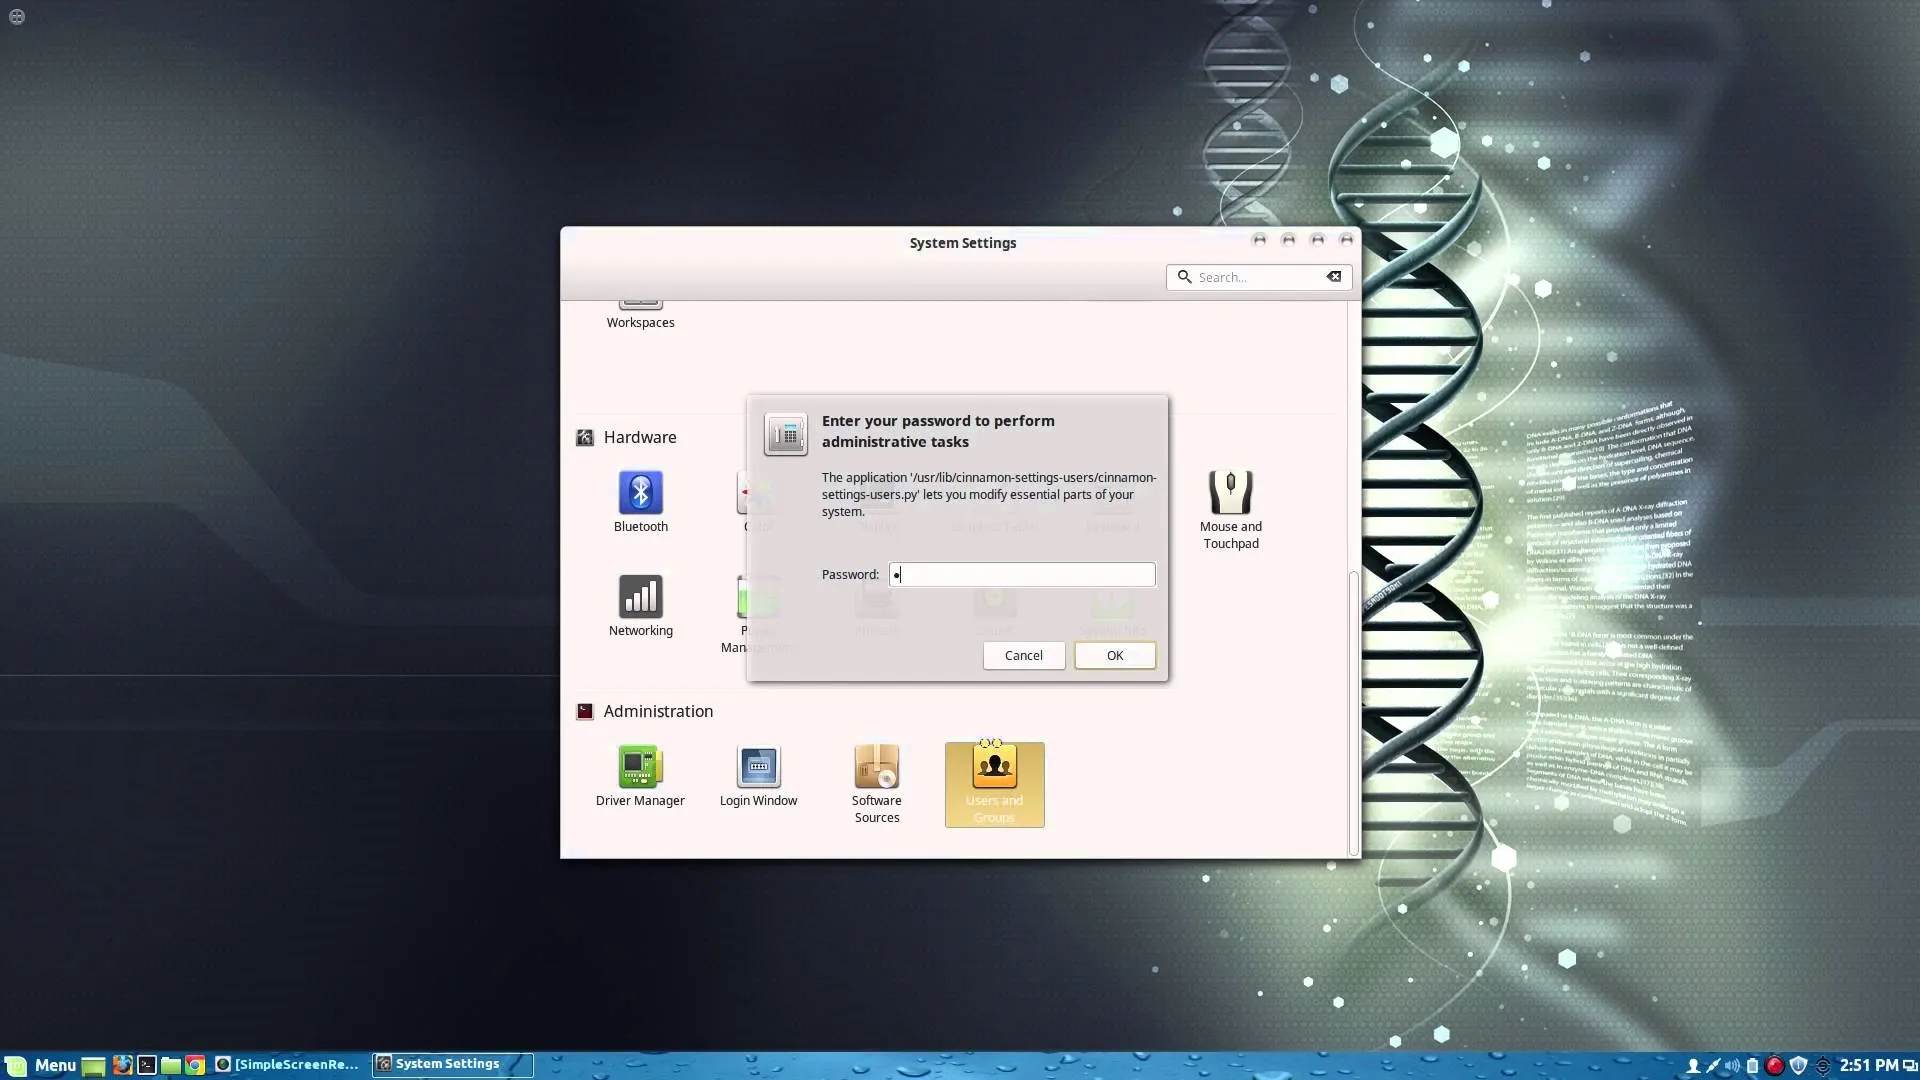
This video will provide an idea how to set, change and remove administrator password in your computer. Watch the video and follow the steps to change administrator password in windows.
This video will guide you how to personalize your desktop or icon in your PC. You can employ it yourself. Watch the video and follow all the steps carefully.
This video will provide an idea how to stop default beep in your PC. The procedure is applicable in both windows 7 and windows 8. Watch the video and follow the steps carefully. Employ the technique to disable start up beep in your PC.
This video will guide you top 10 windows shortcut key which is very useful in everyday computing. Watch the video and follow the steps to know top 10 windows shortcut key.
This video will show you how to use top 10 tips and tricks for windows7 users. This video includes 10 useful windows 7 tricks for windows 7. Just follow the easy steps to implement yourself.
If your laptop getting overheating when you try to install Softwares or does it consuming more power in Ubuntu .This is a step by step solution to the Over heating or battery problem
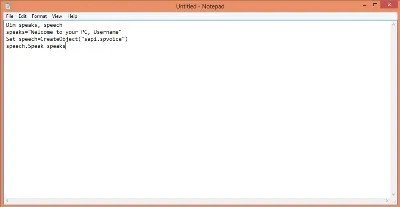
By using this trick, you can make your computer to welcomes you in computerized voice.You can make your computer to say: Welcome Username, Hello Dear, etc
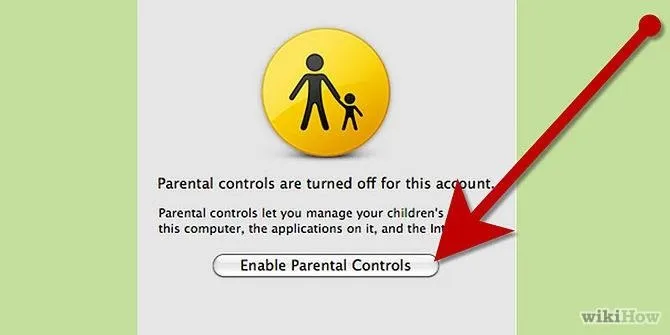
Open the "System Preferences" panel --- Click to open "Parental Controls"(If you have multiple user accounts enabled, you will be able to choose the account that you wish to apply restrictions to. Enter a password if necessary.) --- Click "Enable Parental Controls" --- Locate the "Content" tab --- Select the type of restrictions that you would like to enable.
Maybe your kids are using iPhone/iPad too much, as a parent, you want to know what they are having to deal with to help guide them through of that. Here is the tutorial on how you can parental control your kids on iPhone/iPad. You are able to monitor as well as take control of their devices. Kids' activities on iPhone/iPad like SMS, chats, web browsing will be recorded and you can check them remotely with e-mail without getting access to the devices. OK, here comes the steps:
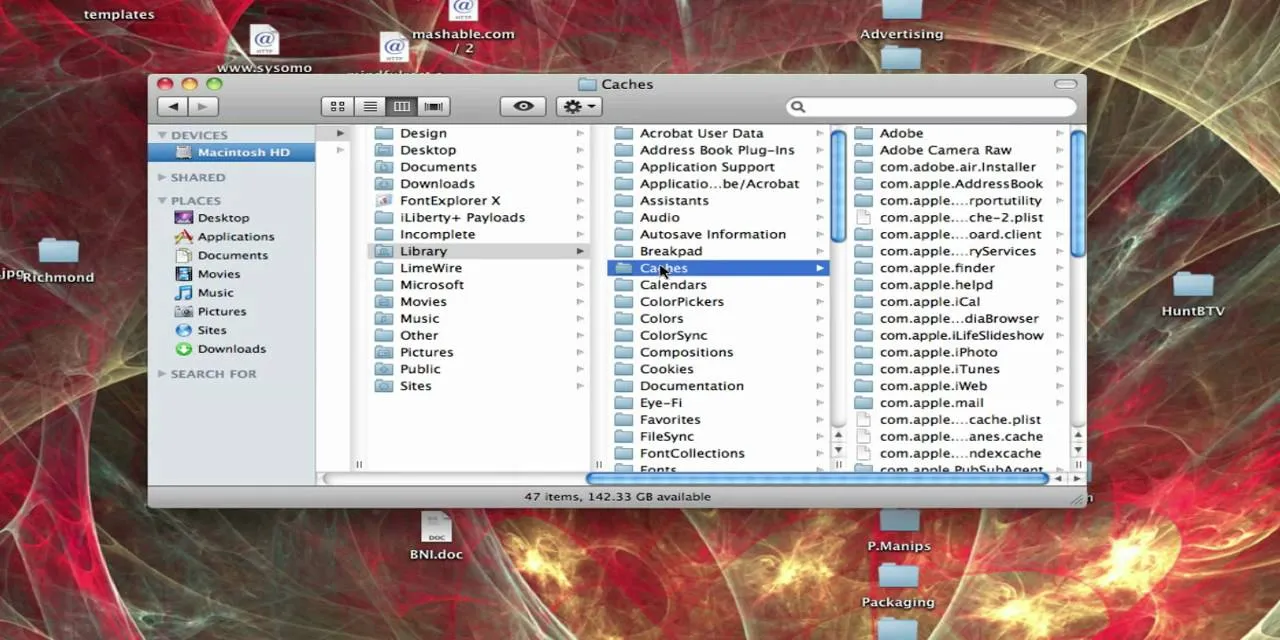
In this tutorial, Brian from TruTricks shows us how to delete a cache in a Mac or any Apple computer. This should be performed at least once every week. First, go down to the menu bar and click on "finder". Click on "Macintosh HD", "Library" ant then "Cache". Now, right click on "cache" and then select "delete" from the drop-down menu. Next, click on "users" and then click on your name, then click on "library", "Cache" and right click and select "Delete". Now, go to your trash can and empty...
Internet slowing down, requiring you to Press F5 several times to refresh a web page is one of the irritating thing a computer user can come across. It needs to be fixed asap.
This video will show you how to Change and customize Desktop Background in Window 7. The video will show you a little extra about desktop customization. Just follow these steps.
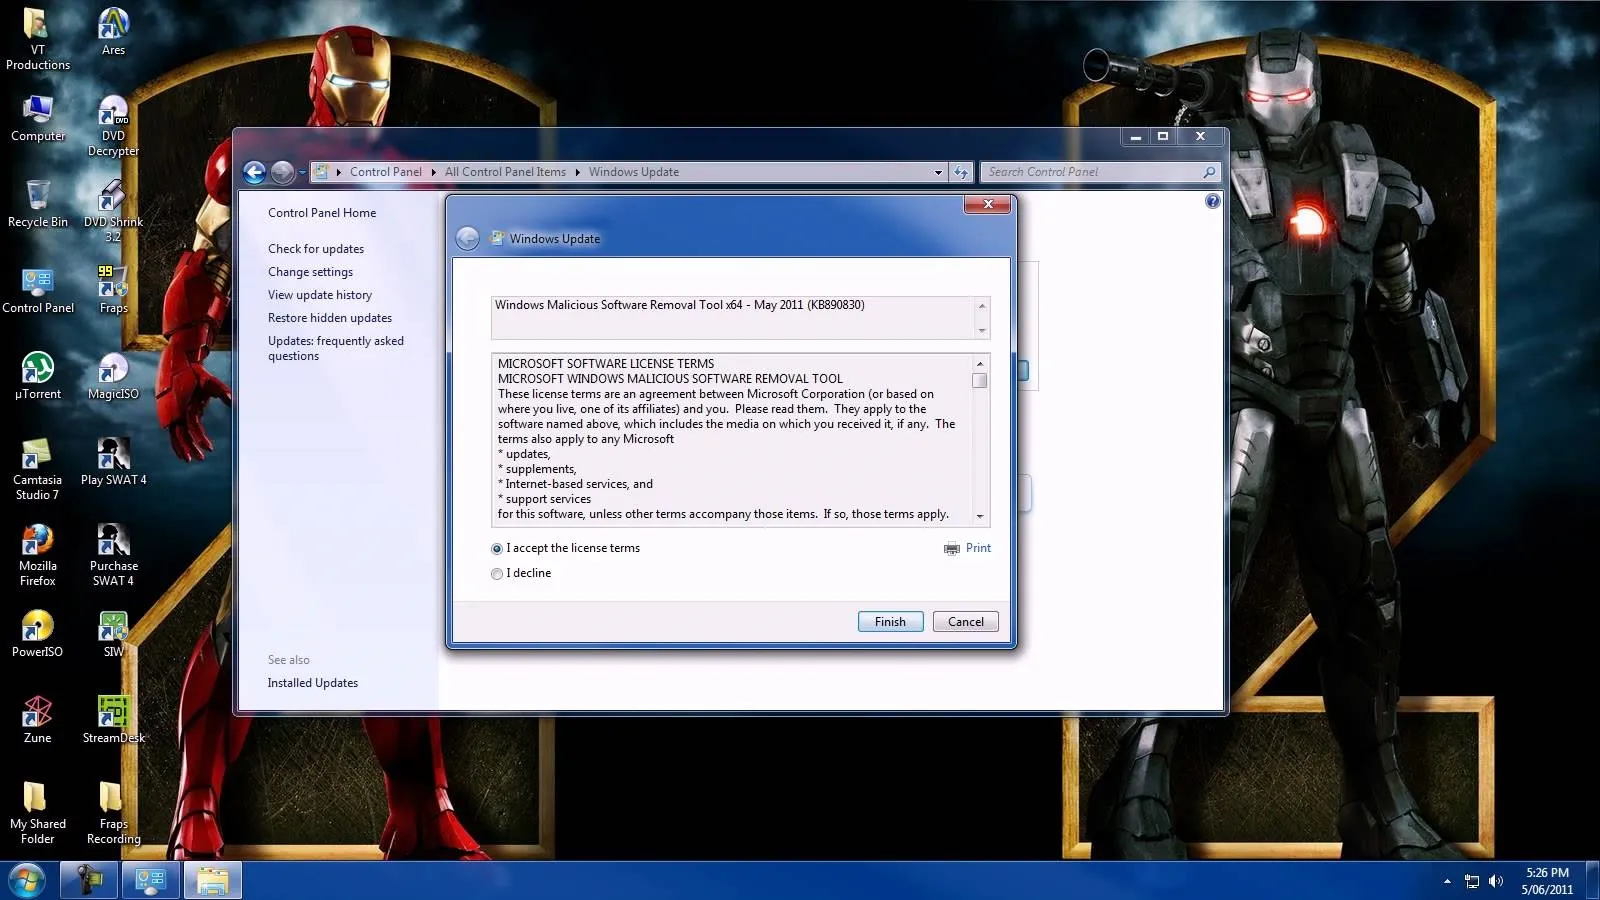
With the help of this video you can update your windows 7 smoothly by yourself. This video will guide you and provides proper steps for updating your windows 7.
Firewall is necessary to protect a computer network from hostile intrusions. You can easily setup your Firewall setting. This video helps you to do it.
You always want to update your windows 7 driver easily but due to lack of improper knowledge you cannot do it. This video provides all the information and steps which required at the time updating your windows 7 driver.
It is typical to share video and files for those who are not friendly with windows 8. But with the help of this video you can share all which you want.
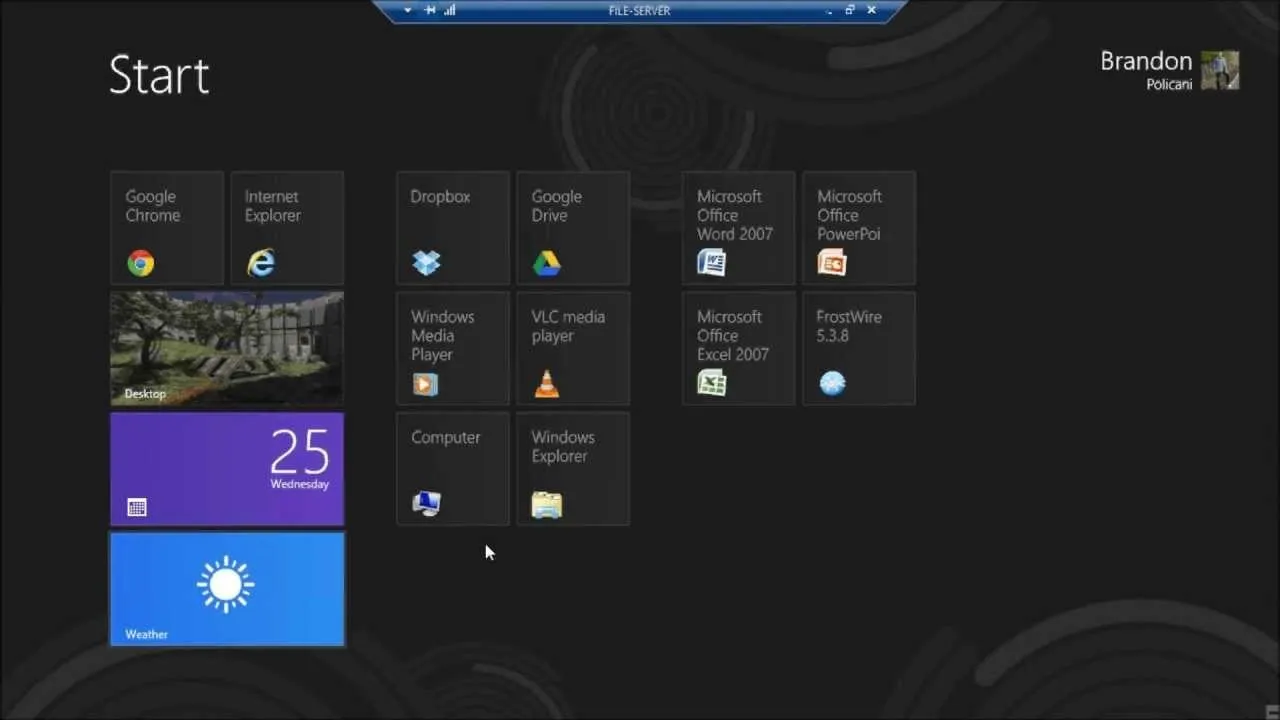
If you having problem to operate Windows 8 then here I submitted a video on how to operate Windows 8 in a very friendly way. This video shows all basic steps to operate windows 8 from starting. Thankful to @corenerd for this video.
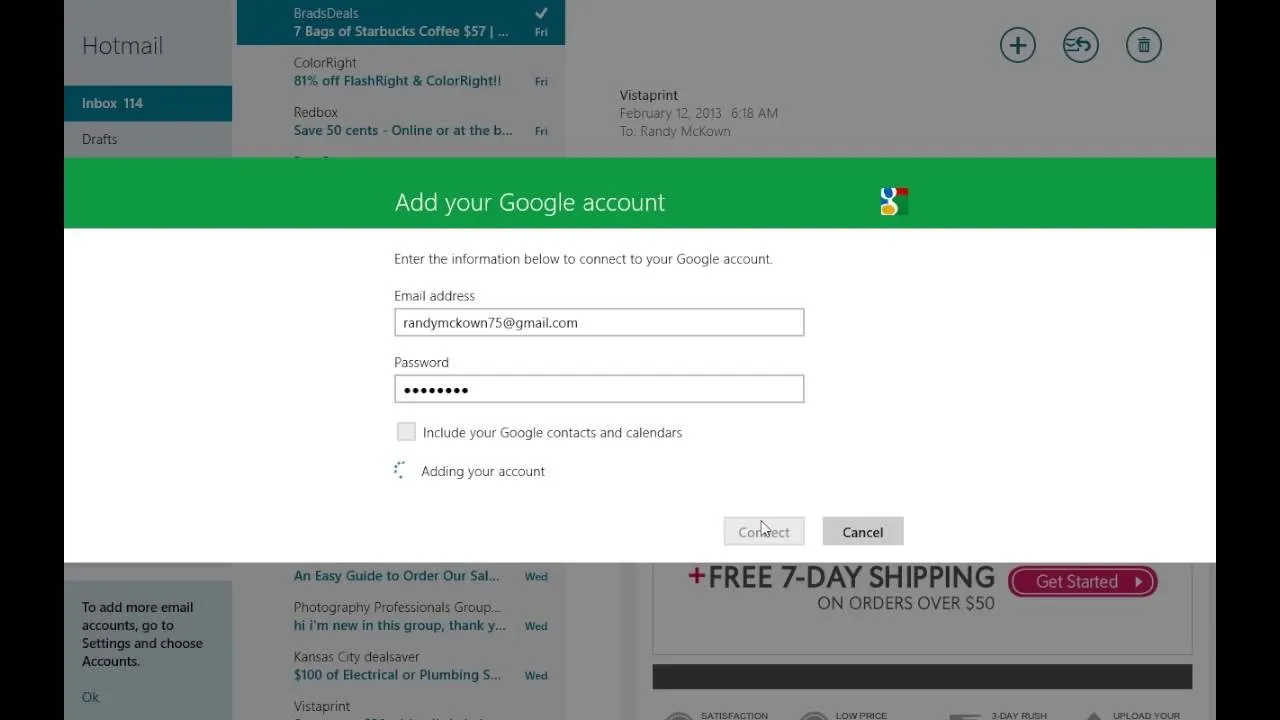
With the help of this video you can easily setup your mail apps in windows 8. Just follow the steps, shows in this video. We are thankful to Randy Mckown for this video.
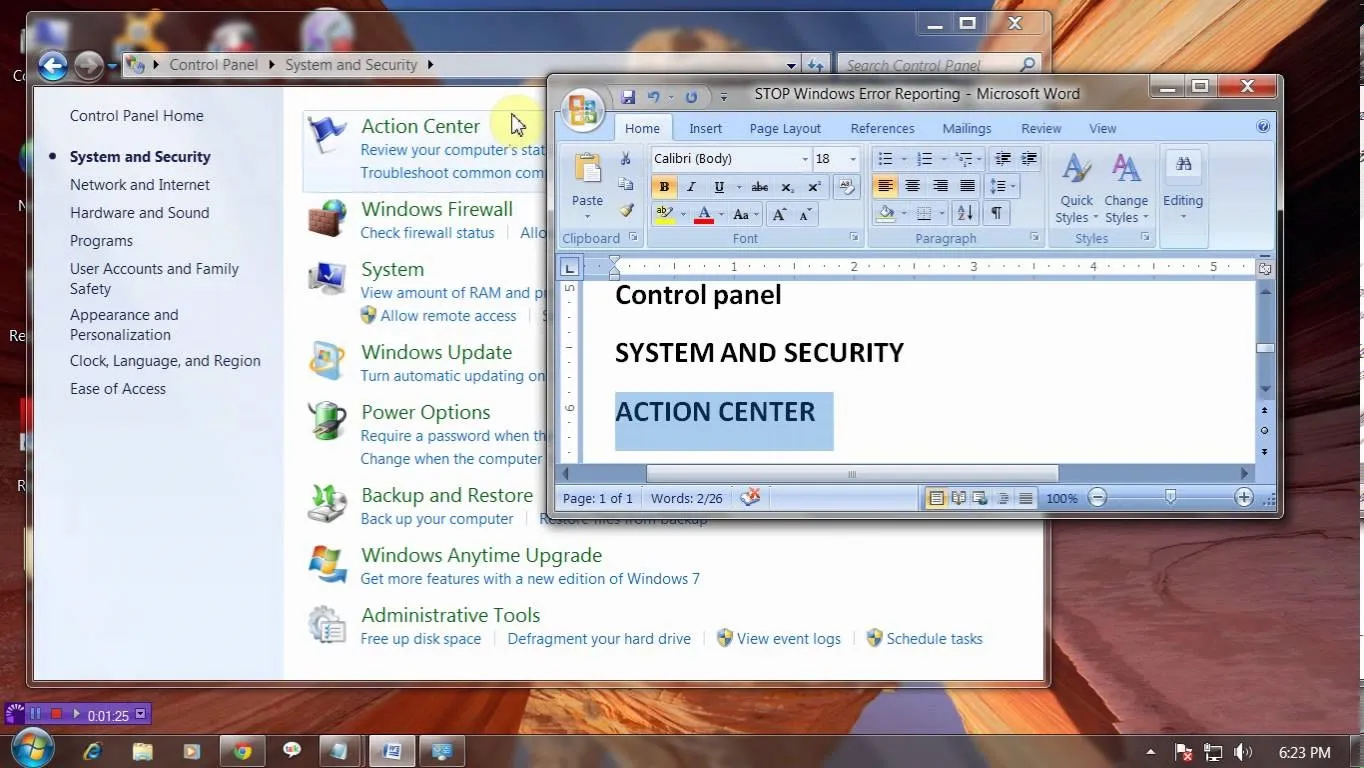
Error reporting in windows 7 sometimes create problem for users. They want to stop or disable this error reporting. Here are the steps to follow for stopping Error Reporting.
Hello friends today we will show you how you could set the administrator password of PC. This video also shows how to change or remove admin password from your PC. You must have access the administrator account. Now just follow the tips.
Hi, often we do something wrong or accidentally delete software, drivers or files from our system. Then we want them back. But how? System restore is the way out. We are showing you how to do that in windows 7.
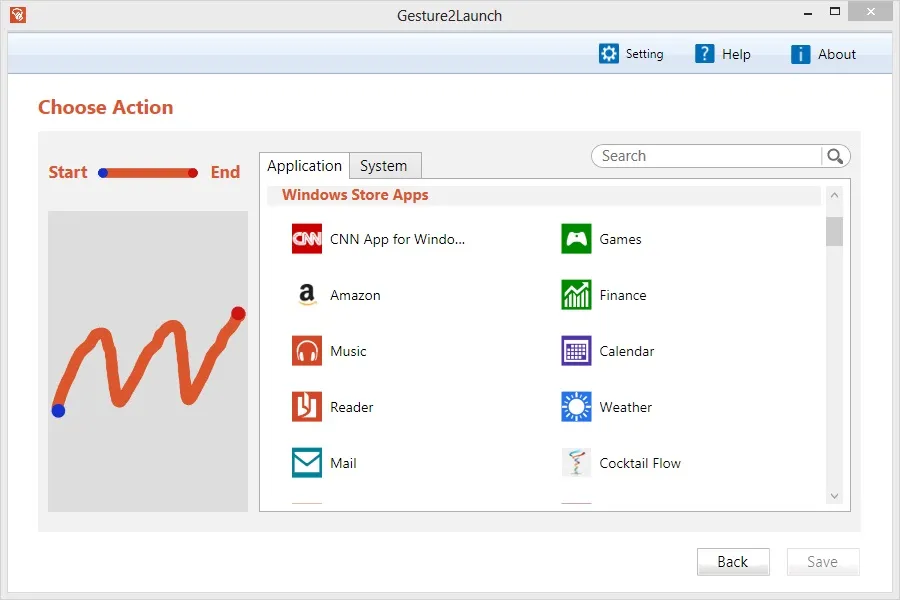
Have you just wanted to get rid of your mouse and keyboard altogether? Using this application allows you to create gestures and use them to open up your most used applications in Windows 8. All you need is Windows 8 and a touch screen and this will work for you!
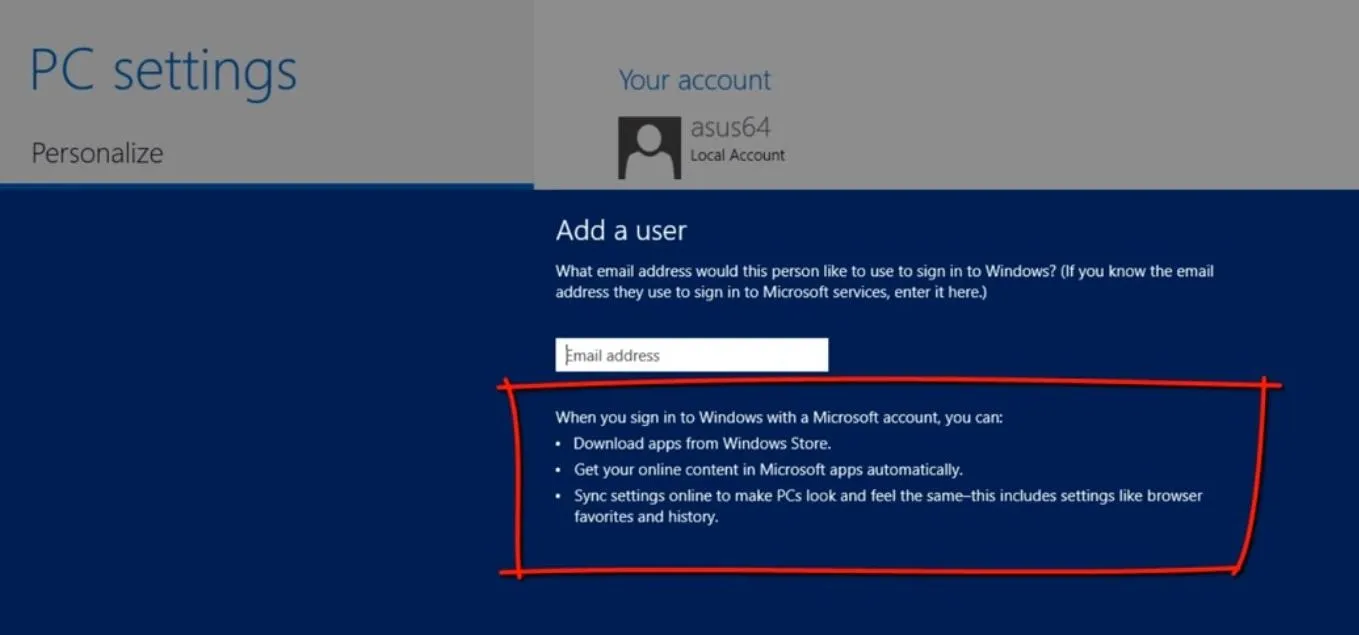
This Windows 8 tutorial will show you how to create a local user account on your PC. When you create a local user PC account, you will only have access to your account from that individual computer. A local Windows 8 user account uses a user name and password to login.
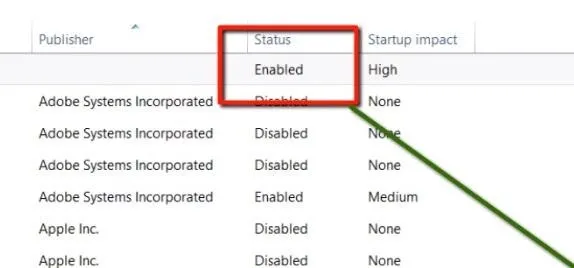
This Windows 8 tutorial will show you how to enable or disable applications from starting up when you boot up your computer. It is sometimes important to disable applications to ensure a smooth start, especially if you computer doesn't have very powerful hardware.